Auto Generate Images from article data with Eleventy and Puppeteer
ACT I: Generating images from quotes in Sixty Six #
I’ve been publishing weekly roundup of frontend related news and articles for about 6 or 7 years.
It’s safe to say I like reading, and I’ve started to highlight when I read. (I use Pocket for reading on Web and Kindle for books. I’ve been switching between Pocket and Instapaper)
I used to give talks on meetups and conferences and all the talks I’ve given (about 40 talks), I always ended with a quote.
Derek says it’s always good to end a paper with a quote. He says someone else has already said it best. So if you can’t top it, steal from them and go out strong.
I’ve followed this advice and quotes are not just in the end. Moreover, If quotes are in English which are almost always, I translate them into Japanese. I needed to have a system not to redo my translation therefore I made a collection of quotes.
I want to create a new home for highlights from my newly found habit and old quotes I’ve collected.
That’s why I’ve started Sixty Six. (What’s with the name? It comes from quote symbol which looks like 66.)
Sixty Six has been very useful for me since I still quote when I write in Virga.
Then I remembered I’ve tried to implement generating social media preview images, but I thought it’s not all that worth to put efforts into implementing, generating and storing images just for social media.
While I need to figure out how to tackle accessibility obstacles using images which primary content is text, I could use good-looking quotes.
There are many excellent tutorials on this topic already:
- Generate Social Media Preview Images
- Automated Social Sharing Images with Puppeteer, 11ty, and Netlify
- Headless chrome netlify functions
All right, let’s give it another shot.
And this is where my journey begins.
This is a story about implementing auto-generate Images from article data with Eleventy and Puppeteer.
Inciting Incident: #
Although I haven’t thought about how I want this image would look like, I’ve given a thought about what I need to do to make this happen.
- Create a template HTML
- Prepare data for the template HTML to generate final HTML
- Take a snapshot of generated HTML
Eleventy is a static site generator, so it’s very good at doing 1) and 2).
For 3), I’ll be using Puppeteer for taking a snapshot.
ACT II: Eleventy is very good at templating #
For 1) and 2), Generate Social Media Preview Images by Dennis Hagemeier is quite helpful.
Eleventy has this pagination feature and despite its name, I can use this to iterate over a data set and create pages for individual chunks of data.
I already have a “data set” which is my quote which is my main content for article in Sixty Six.
Each of my article has this in its front matter:
---
date: '2014-02-13'
quote: |-
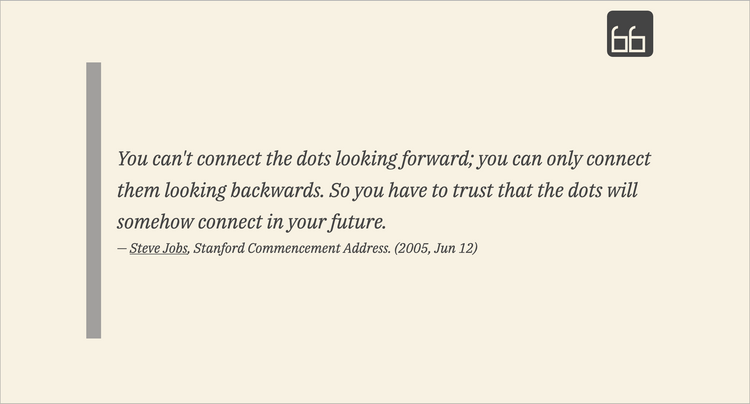
  You can't connect the dots looking forward; you can only connect them looking backwards. So you have to trust that the dots will somehow connect in your future.
tags:
  - Steve Jobs
when: '2005, Jun 12'
cite: Stanford Commencement Address.
---
I already have whole quote which comes in very handy for this story.
As for “create pages”, it can be done by “just” creating a template. It is rarely justified to say “just” in this kind of story but with Eleventy, I think it’s OK to say “just” here.
I did follow Dennis Hagemeier’s tutorial with a few modifications.
---
pagination:
  data: collections.posts
  size: 1
  alias: preview
permalink: "/previews/{{ preview.data.page.fileSlug }}/index.html"
eleventyExcludeFromCollections: true
---
I want to name generated HTMLs same as my article’s and that is what permalink: "/previews/{{ preview.data.page.fileSlug }}/ is doing. I did need help of console.log() for figuring out to come up with {{ preview.data.page.fileSlug }}. It turned out official document has this documented.
And here it is, after an hour or so, I’ve come up with the design:

Now I need to take screenshots.
Midpoint: Taking screenshots #
Puppeteer does all the heavy work for me. From its README, Puppeteer works like this:
const puppeteer = require('puppeteer');

(async () => {
  const browser = await puppeteer.launch();
  const page = await browser.newPage();
  await page.goto('https://example.com');
  await page.screenshot({path: 'example.png'});

  await browser.close();
})();
Now I need to figure out how to provide URLs of all the generated HTML and file name for {path: 'PATH/FILE-NAME.png'}.
Tutorials I’ve mentioned earlier have done this via JSON file which is generated by Eleventy, and I’ve been following this path along as well.
Again, from Dennis Hagemeier’s tutorial:
[
  {
    "filename": "import-tweets-from-twitter-api-in-11ty-en-preview",
    "path": "https://www.d-hagemeier.com/assets/preview-images/import-tweets-from-twitter-api-in-11ty-en-preview.html"
  }
]
It does look simple, and I can imagine how this would be used in Puppeteer for taking screenshots.
Then I took another look at Stephanie Eckles’s article. Her approach is a bit different from Dennis Hagemeier’s.
She has a template which will be feed into Puppeteer as plain HTML, then she used generated JSON file(which is done by Eleventy) to manipulate that HTML. Puppeteer has page.setContent() method which can consume strings of HTML to setContent on page.
Then I thought, could I combine these approaches together?
Eleventy allows me to use JavaScript as one of the template language which means I can use Puppeteer in it and I’m sure I can use Pagination feature which provides data I need to generate HTMLs.
At this point, I already have created HTMLs using Pagination feature, but I need to port that to JavaScript Template Language(Let’s call this .11ty.js from here on).
I could’ve created a boilerplate HTML like Stephanie Eckles’s solution, but I decided to do all the HTML generation in .11ty.js since my entire HTML is about 50 lines or so.
It was turned out to be a bad decision.
I’m sure I’m missing something but…:
- 🗻 There is no
includein.11ty.js- ↪ I have loaded it viafs.readFileSync() - 🔎 Couldn’t find a way to use filters - ↪ Only filter I need was mine, so I imported it as a normal modules and use it as a normal function
- 😢 I needed to do lots of
console.log()to see where the data I need - ↪ I should’ve done TDD using Jest, so I could have usedtoMatchSnapshot().
Metatags to display them as social media preview images #
Despite my bad decision, I have made it work so let’s use them to display on social media. I always consult HEAD by Josh Buchea whenever I need to add metatags in <head> and it does indeed have Social section.
I wanted to add socialImage field to each posts’ data, but couldn’t get it work as expected so:
<meta
  property="og:image"
  content="{{ site.url }}/previews/{{ page.fileSlug }}/preview.png"
/>
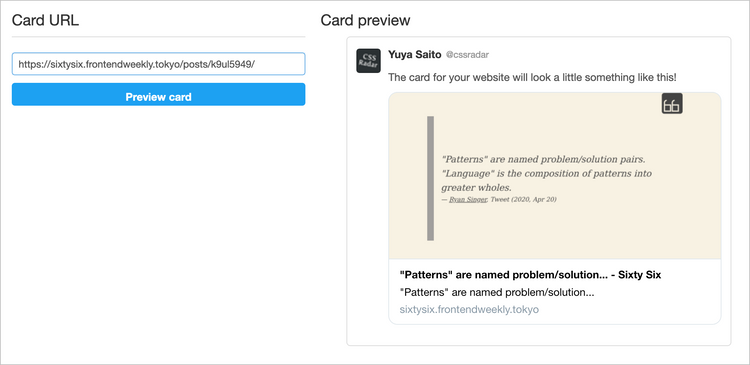
I did this instead which works fine, I think.
…And it works:

Finale #
Generating screenshots takes a lot of time, so I only do it when process.env.ELEVENTY_ENV === 'production';. I haven’t pushed it to GitHub, so I don’t know what will happen on Netlify build yet.
I’m thinking about using Netlify Build Plugins. According to Phil Hawksworth, it can access to the cache between build which sounds like a godsend to my situation.
Exploring Netlify Build Plugins will be a great story.
Finally, Netlify build is done: Build time: 3m 17s. Total deploy time: 3m 27s and last time I had deployed Sixty Six, it was Build time: 1m 18s. Total deploy time: 1m 30s.
For now, I can live with it, but I won’t be porting this feature to any other blogs right now.
Well, then until next journey.